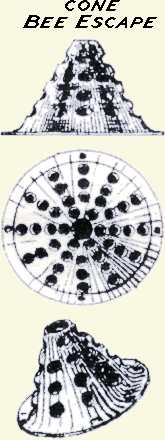
WBC Cone Escape

This traditional British design is made in plastic, zinc, aluminium and brass versions. The metal ones have 3 mm diameter holes. The plastic one is available in black or a speckled gold colour. The slots in the plastic are 4 mm (0.157"). All fixing holes are 1.6 - 2 mm in diameter.
The original use of these cones was to allow easy exit of bees from the space between the inner and outer boxes of the WBC type of hive. To enable this the hole at the top of the cone is 6 mm in diameter.
In recent years they have been used in the lid of a honey jar for trapping wasps (put a little jam and water into the jar).
Red Cone Escape
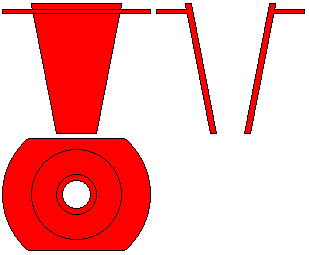
This version is manufactured by E.H. Thorne in UK.
The flange diameter is 37 mm the spigot will fit into a 22 mm diameter hole, the exit is 8 mm internal diameter.
It is used in the five hole escape board and one version of the Shaparew board.
Use of Caulking Nozzle
This item is normally supplied with cartridges of sealing compound. To form it into a bee escape it has to be cut at a suitable point, using a craft knife, so that the resulting nozzle hole is 7-8 mm in diameter. The blue and red lines indicate possible cutting positions.

A novel version of the Shaparew board can be made using several of them. They also have a use when collecting drones for artificial insemination (future page).
To fit them in place requires a drill bit of 16.5 mm diameter (or 21/32"). When the nozzles have been trimmed they are still 90 mm long.
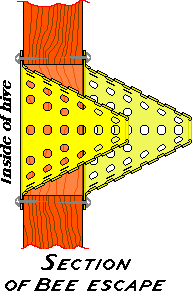
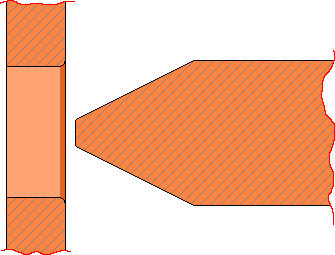
The Metal WBC cone was incorporated into the CDB Hive in pairs and the drawing at left shows how they were arranged. The hole that was bored was 1 3/8" (35 mm) in diameter and the board had a thickness of 5/8" (16 mm). There is a natural elegance in
this design, which is easily seen, but particularly appeals to my design engineer's eye.
The three views at right have been lifted from a drawing that deals with all aspects of the CDB hive. I have left it un-retouched in deference to the draughtsman's art and style.
Wire Mesh (Screen) Cone
These are used as bee escapes in a similar way to the WBC and red types and can be of similar shape to either of them (or anywhere in between). They can also be used to form exits for bees from extracting rooms and honey houses. I have seen them recommended for use in removing colonies from hollow trees and hollow walls of buildings, but I personally prefer a cone that is opaque for this purpose.
The mesh chosen must be woven metal wire mesh:- 6, 7 or 8 wires per inch. Cut the mesh into approximately 100 mm square pieces.
To form the cone you will need a male plug former (punch), turned from hardwood, that is the same shape and size as the inside of your intended cone. You will also need a female die to press the mesh and plug into... This can be just a simple hole in a hardwood block, however rounding the edges of this hole will make the rest of the task easier. (This edge will naturally become polished with use and this hard shiny surface makes the job easier still.)
Place the mesh, centrally, over the die and push down on the plug with a circular rocking motion, Do not force this part of the process, it takes time as the woven strands need to slide over each other to adopt new positions and you will see the cone gradually take shape. After a few tries you will find a "sympathy" with the process (when you try this for yourself you will fully understand this statement).
Once the pressing operation is completed the cone will have a flange at it's base that may not be very flat and the material will have become pin cushion shaped. Make the exit hole in the flat tip of the cone, just large enough for a bee to squeeze out (6 mm), using a tapered metal spike, again with a circular rocking motion, to part the wires... A dab of soldering flux, soft solder and a large soldering iron can then be used to fuse the parted wires into a solid rim. (as inset) The soldering operation does more than hold the hole size rigid, it smoothes out irregularities and any roughness in the wire giving a rounded appearance that I am sure a struggling bee will appreciate. Then replace the cone in the die and tap the base flat with a small hammer and many small blows working out from the middle. Finally trim the excess flange material away... The base can be circular or square, but I find that a square is more easily stapled to a flat wooden surface although a circular one is more easily 'stitched' into a mesh sheet (using tinned copper wire).