| Parts List | ||||||
| Part | Length mm | Width mm | Thickness mm | Quantity | Material | Note |
| Top Bar | 216 | 28 | 9.1 | 1 | Hardwood | Ends reduced to 22 mm |
| Rear uprights | 197 | 14.5 | 9 | 2 | Marine ply or softwood | |
| Front uprights | 196 | 14.5 | 9 | 2 | Marine ply or softwood | |
| Frame bottoms | 178 | 14.5 | 9 | 2 | Marine ply or softwood | |
| Front frame top (long) | 102 | 14.5 | 9 | 1 | Marine ply or softwood | End trimmed 45° |
| Front frame top (short) | 26 | 14.5 | 9 | 1 | Marine ply or softwood | End trimmed 45° |
| Rear frame top (long) | 102 | 14.5 | 11 | 1 | Marine ply or softwood | End trimmed 45° |
| rear frame top (short) | 26 | 14.5 | 11 | 1 | Marine ply or softwood | End trimmed 45° |
| Inner top (long) | 102 | 28 | 9 | 1 | Marine ply or softwood | |
| Inner top (short) | 26 | 28 | 9 | 1 | Marine ply or softwood | |
| Rear panel | 216 | 178 | 1 | 1 | Birch ply | |
| Front top strap | 178 | 25 | 1.6 or 2 | 1 | Birch ply | |
| Queen excluder | 186 | 178 | 0.8 | 1 | Zinc | |
| Two small brass hinges and small latch | ||||||
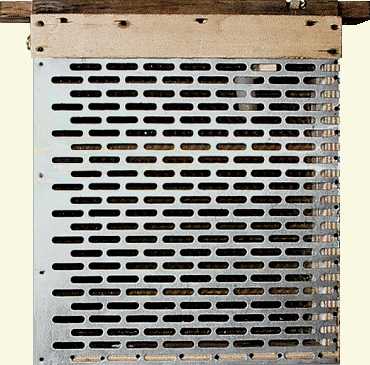
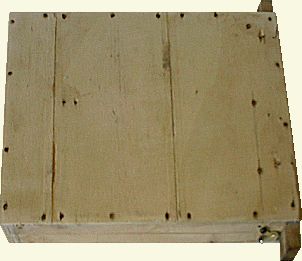
A cassette frame method of re-introduction of instrumentally inseminated queens that can also be used as a banking system for longer term use than with a simple queen cage.
The version shown on this page is based on a half width BS National frame, the basic dimensions of which are given on the Half frame page, although thickness is 31 mm instead of the more usual comb thickness of 25 mm nominal found in a brood nest ( the frame illustrated is 35 mm total width owing to the plywood being thicker. The frame is simply two rectangular frames that are hinged together at the bottom, the front face has a sheet of queen excluder zinc and the rear has a sheet of thin plywood. There is an arrangement for holding a wooden block to which an introduction cell is attached, The view at right shows the frontal appearance.
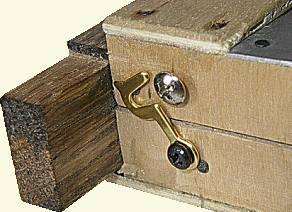
A small proprietary latch is used to hold the hinged halves in the closed position. The queen excluder face is reasonably transparent to worker bees, but they are encouraged to enter the cassette as there is a tendency of the queen pheromone to accumulate in the wax of the comb over a long period of use.
![]() The two halves of the cassette are shown in the open position below. The unusual purple colour and stripes are due to the availability of some thin plywood from dismantled fruit boxes. Thin Birch plywood is the intended backing material and is available from shops that service aero-modellers, two versions of such plywood are illustrated against a black background at right the two thicknesses being 1 mm and 1.6 mm and are shown somewhat magnified. Although thin, this ply is of adequate strength for the job especially after the foundation
is fused to the plywood.
The two halves of the cassette are shown in the open position below. The unusual purple colour and stripes are due to the availability of some thin plywood from dismantled fruit boxes. Thin Birch plywood is the intended backing material and is available from shops that service aero-modellers, two versions of such plywood are illustrated against a black background at right the two thicknesses being 1 mm and 1.6 mm and are shown somewhat magnified. Although thin, this ply is of adequate strength for the job especially after the foundation
is fused to the plywood.
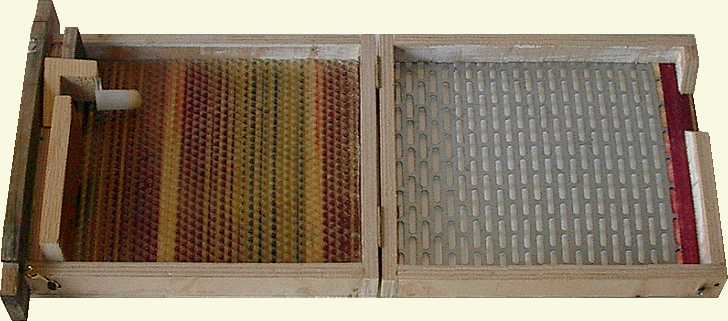
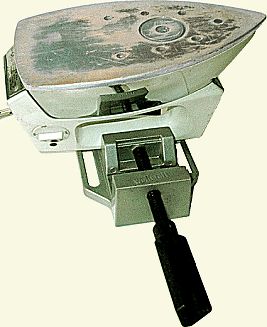
The back half of the cassette has a half thickness comb in which the newly inseminated queen can lay. The comb is drawn by worker bees (preferably under swarm box conditions while being copiously fed), but before this can happen a suitable sized and shaped piece of foundation needs to be fused to the plywood. I have a novel method of doing this using a domestic iron that is held upside down in a machine vice (hand vice).
The objective in fusing the foundation to the plywood has several reasons behind it, the foundation and the comb that will be built on it act as stiffeners for the thin plywood backing. The melting action ensures that the comb is solidly fixed and cannot come away from the ply. The thickness of the foundation is reduced so that only the face that will be built on has any patterning.
The fusing action is quite easy, >but requires a bit of 'trail and error', the iron was set fairly low in it's temperature range and it's sole plate was arranged to be horizontal, then the foundation was placed in position inside the frame and the rear face of the plywood passed smoothly across the heated iron while remaining in flat contact with it. The passing motion was repeated until the first melting of wax was noticed, then the passes were made less often so that the heat transferred had time to travel through the thickness of the plywood back, as soon as the visible cell bases started to melt the process was stopped and the wax allowed to solidify.
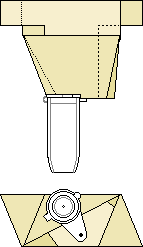
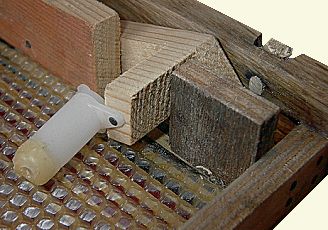
The upper right corner of the cassette frame has cut outs to accommodate an introduction cell mounted on a block as shown at near right, the block itself being illustrated at far right. The preparation of the introduction cells is covered on this page.
Various shapes of block have been used the one in the photograph being different to the drawing, but they both fit in the same space, which is detailed on a cellspace page, also shown on the separate page is a wooden blanking plug which needs to be in place while the comb is being drawn.
Even with the blanking plug in place, once the comb has been drawn the area around where the cell will be placed after insemination will need to be shaped using a modified soldering iron.

To illustrate the assembly of parts the top view is shown slightly open in order that the 9 mm thick parts that are cut at 45° can be shown, the 11 mm parts are installed in the rear frame half as mirror images of the ones that you can see. The difference in thickness gives clearance to allow closure.

The base view is slightly larger in scale and shows the hinges as well as the edge of the zinc queen excluder. When fixing the hinges place a sliver of card or tinplate temporarily between the mating faces of the wooden rim parts so that after fixing the hinges will not bind.
Note... The astute will have noticed that there is an unusual looking wooden peg in the top bar, this is nothing more than a blanking piece glued into a hole left over from a previous use of the bar ( as a skinflint beekeeper I waste very little ).