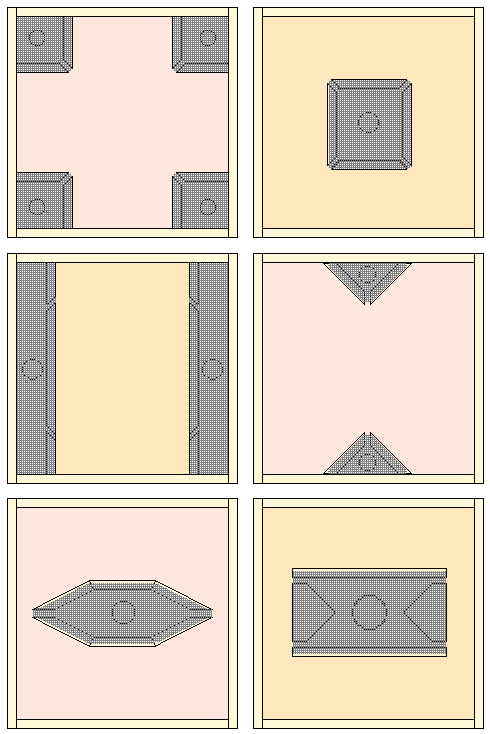
Wedmore attributed the inception of this design to someone in Ontario, but gives no name or date.
Many styles have been made by individuals... Here are some types that I have seen or have read about.
Those that have the escapes on the outer periphery would benefit from a mesh panel in the middle of the blank central portion.
The version illustrated at bottom left is very similar to the Lozenge or Rhombus Escape.
The distance between the main panel and the mesh varies from 7 mm to 12 mm.
Much of the design is arbitrary the principle behind this form of escape is a hole that leads into a space enclosed by mesh, a space that itself has exits that are remote from the inlet hole.
The very fact that there are so many variations in design means that nobody has found an optimum layout, which I interpret to mean that there is no particular "best" layout, although I favour those that have a single central hole and outlets that are well away from any cluster that forms below the hole.
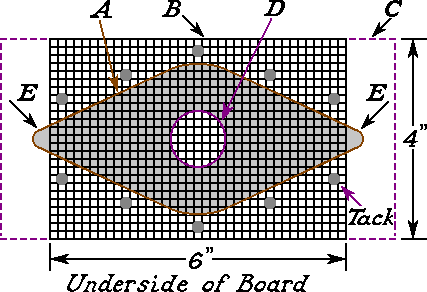
The Wedmore version of the Canadian escape
In Paragraph 701 of 'A Manual of Beekeeping' Wedmore considers that the 'normal' version (middle right in the above diagrams) has too large a Bee Space. I cannot see why he would consider this a problem as the escape board will only be in place for a few hours, or a day at most, but in order to overcome this he designed an escape that is illustrated at right, named 'an Improved Clearer Board' it overcomes his objections as it has a tinplate baffle on one side and a mesh panel on the other (of a board that is in his case was 5 1/16" (8 mm) thick.| Key | Description |
|---|---|
| A | Diamond shaped hole in framed board 5/16" (8 mm) thick |
| B | Wire gauze on underside (Wedmore used 6 mesh) |
| C | Tinplate or thin plywood, on upper surface |
| D | Entrance hole 1" (25 mm) in centre of tinplate |
| E | Exit hole 5/16" x 5/16", caused by mesh being shorter than diamond shaped hole |
Wedmore recommended an upper rim of 1/4" (6 mm) and a lower rim of 5/16" (8 mm).
Hexagonal version of Wedmore escape
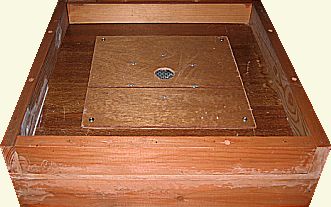
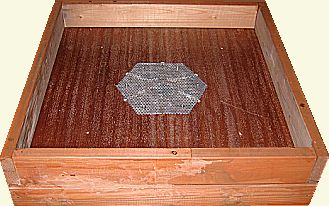
This hexagonal version is the work of William P. Edwards, whose photos are reproduced at right.
Underside metal hexagon... Perforated half-hard aluminium sheet 0.6 mm thick cut to form a hexagon 150 mm across flats. Hole size 3 mm window area 40% of sheet.
Bill found it helpful to produce a hexagon template of the same dimensions with a central hole to suit a frame pin 2-3 mm dia. This was then used to exactly position the plate centrally and drill 2 mm pilot holes for the exits.
The top cover board was 300 mm x 300 mm x 6 mm with central hole 32 mm dia. The 8 mm thick main board was cut-out using 8 mm dia. exit holes plus central hole of approximately 50 mm, the escape track cut-outs. (bee walkways) were cut with a jigsaw so as to form a tapered slot from the central 32mm dia hole.
Assembly suggestions... Adjust the hexagon sheet into the optimum position so that the sides of the hexagon are equidistant from the tips of the 8 mm escape holes then clamp into position and drill six suitable fixing holes.
Bill's version had the edge of the perforated metal aligned with half of each exit hole exposed, he reports...
"I have used the six way once when I compared it with the Eight way. The eight way resulted in about 12 bees left and the six way about 20 young bees left after about three hours placement. I shall use it again for the main crop removal."
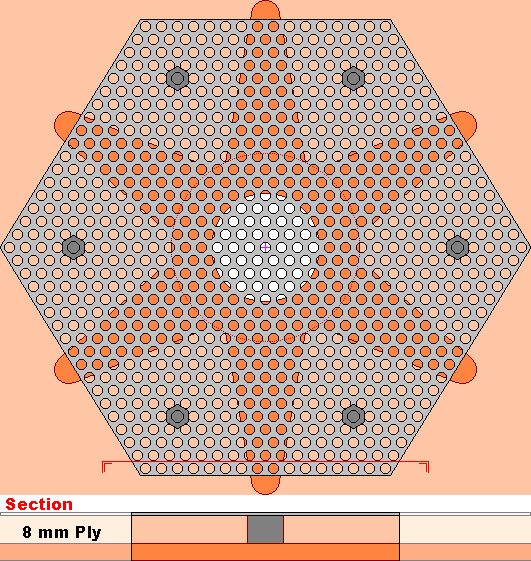 Having studied Bill's prototype I have produced the drawing at right and in order to allow for different materials that might be available I have generated a method of marking out to suit whatever material you have to hand.
Cut your hexagon so that the edges are smooth where there are no holes, this will eliminate any wing damage that could occur with jagged edges. Work to approximately 150 mm across the flats, but your final dimension will depend on the hole size and spacing of your perforated sheet (ensuring that there is a hole in the dead-centre of the hexagon).
Use your hexagon as a template, drill a hole in the centre of your plywood plate that is the same size as a perforation and attach your metal hexagon temporarily using a suitable nut and bolt. Align the hexagon with the board sides and draw around it's edge with a pencil, at the same time select suitable positions for fixing bolts and mark them with the pencil, also mark the mid point of each of the hexagonal sides. Remove the temporary nut and bolt and draw a 32 mm circle based on the central hole, mark out the centres of your 8 mm exit holes so that the edge of the hole just overlaps the edge of the hexagon (about 7 mm, but it is not critical) draw the 8 mm exit holes and draw in the tapered channels to as tangents to the central 32 mm hole. draw a 50 mm or 60 mm circle to create the central gallery area, drill pilot holes and fixing holes to your markings and remove the star shaped area using a jig saw.
The plywood capping plate can be 3, 4, 5 or 6 mm in thickness and can be clamped to the main plate during the drilling of pilot holes so that everything lines up for ease of assembly, the 32 mm hole in this capping plate can be made with a hole saw, using the central pilot hole to position the hole saw pilot drill.
New Zealand clearer board
The type shown at top left is Known as a New Zealand clearer board if it only has two escapes in diagonally opposing corners.
There is a type of plastic insert that can be fitted to fairly simple rimmed boards, although it is commonly called a New Zealand escape, this version is actually manufactured in Australia and I was sent the details by Simon Rees along with some photographs.
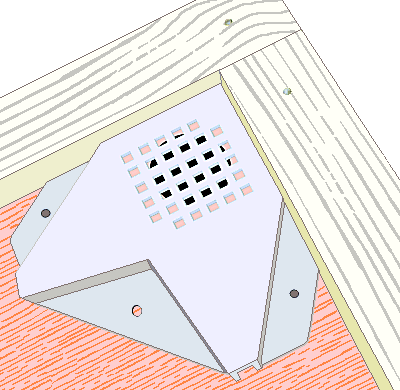
The drawings have been prepared from the photographs, that were supplied by Simon, who obtained his inserts from:-
Ecroyd Beekeeping Supplies Ltd
PO Box 5056, Papanui,
6a Sheffield Crescent, Burnside
Christchurch, New Zealand
Ph: (64 3) 358 7498; Fax: (64 3) 358 8789
Email:
stuart@beehealthy.co.nz
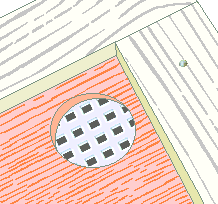
The insert is made by Parker Engineering Pty Ltd. who manufacture a full range of beekeeping goods.
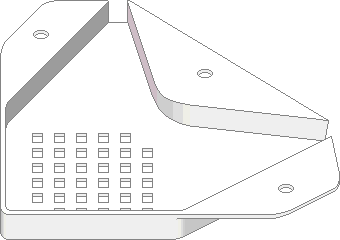
The items concerned are available from a number of suppliers in Australia and New Zealand. The drawing at right is copied from a photo on the Bindaree Website in order to skirt around any copyright, there is another picture on this link that shows four such escapes mounted on a board.Parker Engineering Pty Ltd.
21 Shellharbour Road
PO Box 9
Dunmore, NSW 2529
Phone: (02) 4237 8377
Fax: (02) 4237 8377
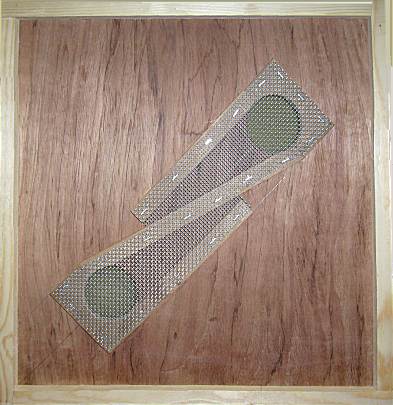
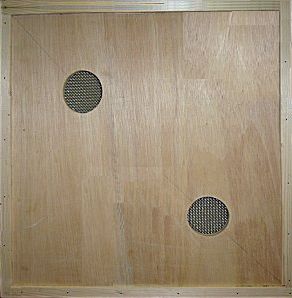
The type shown here was spotted at the 2006 National Honey Show. It makes good use of a rectangle of mesh and has only a few components, but I do wonder if the exits are a bit close together and may become clogged by clustering bees. It was designed by F.G.W. Howard and was on sale at £16.00 at the time with the title of 'Turbo Clearer'.
The smaller image is of the top side of the escape board.